.JPG)
What is Oil Cleansing?
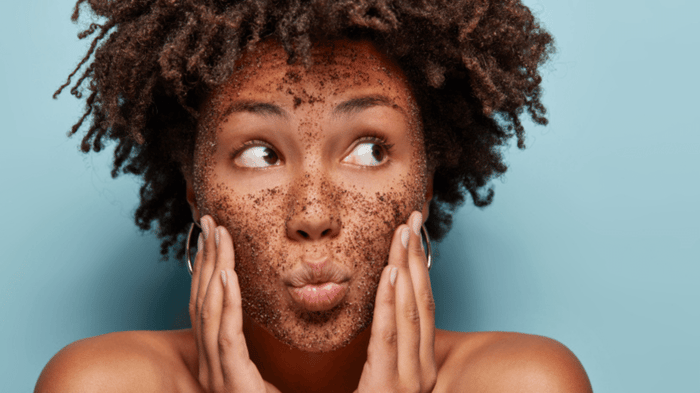
Facial oil cleansing, oil cleansing method, describes the process of cleaning your skin by applying different types and combinations of natural plant oils to your face, massaging the oils into the skin, and then wiping them off with a clean, hot cloth. You can also add a step to steam your face while the oil is on it to open the pores and allow the oils to penetrate more deeply for even more benefits. This method will clean your skin while providing specific nourishment based on which oils you use.
Facial oil cleansing dates back thousands of years, where it was practiced as a way to purify the skin while balancing natural sebum levels. Balanced sebum production is important for hydrated and healthy skin. It may seem counterintuitive that oil can cleanse your skin; however, the oil penetrates into the pores and attaches to dirt, impurities, and excess sebum, and can actually dissolve sebum deposits that are clogging pores. When you wipe the oil away it takes all the unwanted stuff with it and leaves clear pores and clean skin. This method doesn’t strip your skin of its natural protective oils like soap, some cleansers, and even plain hot water can do. It also allows you to avoid irritating chemicals or pore-clogging ingredients found in many conventional cleansers.
Here are some of the benefits of facial oil cleansing:
- Inexpensive, simple and easy
- Moisturizing/Balancing - helps balance natural sebum levels in the skin
- Soothes acne, breakouts and sensitivities, clears clogged pores and blackheads
- Anti-Aging - skin stays hydrated and supple, reduces puffiness
- Great makeup remover
- Relaxing and aromatherapeutic

Which Essential Oils Should We Include?
Oil cleansing can be done without the use of therapeutic essential oils, but it’s even more helpful if you add the proper essential oils based on your skin type and skin concerns. You will also get additional benefits from aromatherapy due to the essential oils. For your skin and your soul, there’s not much that is more luxurious and healing than essential oils!
Here are some of the best essential oils to use in an oil cleansing mixture:
- Geranium oil – Balancing, soothes skin, tones skin, reduces the visibility of pores, enhances the youthful look of skin, cleansing, sweet, floral scent. Use for: Acne-prone skin, Oily skin, Dry skin
- Tea tree oil – Cleansing properties, reduces the appearance of blemishes, deodorizes, strong astringent scent. Use for: Acne-prone skin
- Lavender oil – Soothes skin irritations, de-stressing, reduces the look of blemishes, calms and relaxes, reduces redness, supports aging skin health. Use for: Aging skin, Combination skin, Acne-prone skin
- Frankincense oil – Antioxidants, improves the look of pigmentation issues, lightens redness and blemishes, uplifting/stimulating aroma, promotes radiant skin, woody fragrance. Use for: Aging skin
- Rose oil – Luxurious, anti-aging, reduces the look of redness, soothes skin, rich in antioxidants, balancing, evens out skin tone, boosts confidence, uplifting aroma. Use for: Aging skin
- Vetiver oil – Evens skin tone, balancing, earthy aroma that’s relaxing and helps focus, uplifting. Use for: Acne-prone skin
- Cypress oil – Grounding scent, improves the appearance of skin firmness, calms redness, reduces puffy appearance, supports skin structure. Use for: Aging skin, oily skin
- Sandalwood oil – Antioxidant-rich, smoothes skin, reduces the appearance of imperfections, gently exfoliates, lightens redness, tones skin, moisturizes, calming. Use for: Aging skin, dry skin
- Chamomile oil – Calming, soothing, warm and gentle, fruity aroma, reduces the appearance of redness/irritations, soothes stressed skin. Use for: Dry, irritated skin.

How Do I Make My Customized Oil Cleanser?
You will start by picking a base oil for your cleanser. It's important to choose high-quality, cold-pressed oils that have not been processed with chemical extraction. Choose organic and unrefined if possible. The base oils have different feels and scents and you should choose based on your personal preference. I like jojoba oil for my base because it feels good, smells good, doesn’t clog my pores, is gentle on my sensitive skin, and is full of vitamins. Some good base oils to try are avocado, sunflower, sweet almond, and olive oil.
You will customize your oil cleanser based on your skin type. For normal skin you can stick with the base oil you chose at 100% concentration, but if you have oily or dry skin you can make a blend that is more suited to your skin by adding in an astringent oil or nourishing oil to your base.
For dry skin start with one part nourishing oil to 3 parts base oil. For oily or combination skin start with one part astringent oil to five parts base oil. You can change the ratios to get to the mix that feels right for your skin. Your skin should feel moist and balanced after cleansing, not tight and dry or overly oily. My favorite nourishing oils are argan, rosehip, and shea nut oil and some great astringent oils are castor, hemp seed, and grapeseed oil.
Next, your cleanser recipe can be enhanced with the addition of essential oils. Start small with just a few drops of one or more oils and adjust amounts as you find what works. You will want to experiment a bit to find mixes that are right for your skin and your senses. It should smell good!
Mix all the oils together in a dark-colored glass bottle or jar, which will protect the oils from UV light. I like to use 4 oz. amber dropper bottles. Here’s a summary of popular essential oils to try adding to your cleanser by skin type. Try your favorite scents or choose based on the specific properties of the oils.
Aging and Wrinkles: Cypress, Sandalwood, Lavender, Frankincense, Rose
Acne-Prone: Tea Tree, Geranium, Vetiver, Lavender
Combination: Lavender, Chamomile, Bergamot, Patchouli
Oily/Sensitive: Geranium, Cypress, Lemon
Dry: Geranium, Sandalwood, Chamomile, Myrrh

Too Busy for DIY?
If you want to try oil cleansing but don’t have time to make your own cleansing oil blend, we recommend Mirah Luminous Cleansing Oil from Young Living. It includes a mix of nourishing and astringent natural base oils such as sunflower, jojoba, grapeseed, and argan with 10 different essential oils to clean and feed your skin. It’s gentle and nourishing and works well for most skin types.
Have you tried oil cleansing? Tell us about your experience in the comments below. What are your favorite oils to use? And if you are interested in an anti-aging oil cleansing blend - try this easy recipe.
FAVORITE DIY ANTI-AGING CLEANSING OIL BLEND
Ingredients:
-
4 oz Glass Bottle or Jar (dark-colored)
-
6 T Jojoba Oil
-
2 T Argan Oil
-
4 drops Lavender Essential Oil
-
4 drops Frankincense Essential Oil
-
2 drops Cypress Essential Oil
Directions
To make the cleanser:
-
Add all ingredients to a dark-colored glass bottle or jar and stir or shake to evenly mix the oils.
-
Store for up to several months.
To clean your skin:
-
Deeply massage 1/2 teaspoon of the oil blend into your face using upward circular motions for about 60 seconds. You may need to rub some extra into your lashes and eyelids if you have eye makeup to remove.
-
Wring out a soft cloth in hot water and gently press it onto your face.
-
Rinse the cloth and repeat the previous step. Now wipe the excess oil from your skin and quickly rinse your face with cold water.
-
Pat your face dry.
-
Moisturize as needed--though I usually find that I don't need to moisturize following oil cleansing.
-
Enjoy clean, balanced, beautiful skin!